> For the complete documentation index, see [llms.txt](https://docs.powerembedded.com/llms.txt). Markdown versions of documentation pages are available by appending `.md` to page URLs; this page is available as [Markdown](https://docs.powerembedded.com/administration-portal/migration.md).
# Migration
To simplify the configuration of Power Embedded, we have prepared a script that automates the process of importing users, RLS, and Power BI reports into Power Embedded in a simple and easy way.
## Requirements
To successfully execute the migration process, the following permissions must be enabled:
Admin permission for the service user
This permission must be enabled in all workspaces that will be available in the portal.
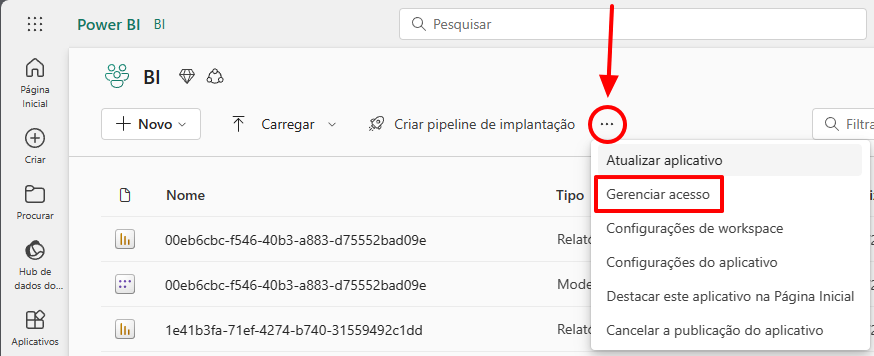
To add the created Service Principal as a workspace administrator, access the workspace, click on the three dots, and select the "Manage access" option.
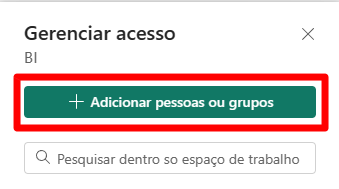
Click the “+ Add people or groups” button.
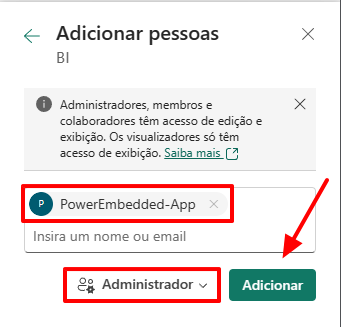
PSearch for the name of the previously created application (**PowerEmbedded-App**) and remember to change the access level to **Administrator**. Then, click the **Add** button.
That's it! Power Embedded now has access to this workspace. Repeat this process for all workspaces from which you want to import reports.
API Read Permissions
Permissions for Importing Data from Entra ID
To import user and group data from Entra ID, specific permissions must be assigned to the Service Principal created in the **Azure Portal**, which is used by Power Embedded to communicate with your environment.
In the [**App Registrations**](https://portal.azure.com/#view/Microsoft_AAD_IAM/ActiveDirectoryMenuBlade/~/RegisteredApps) screen, search for the name of the created application (the default name is **PowerEmbedded-App**).
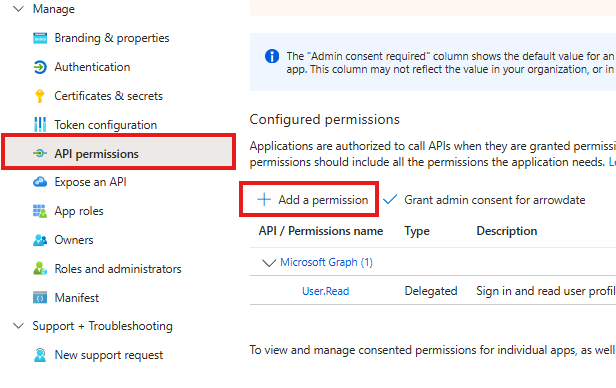
In the application screen, click on **API Permissions** in the side menu and then on *Add a Permission*
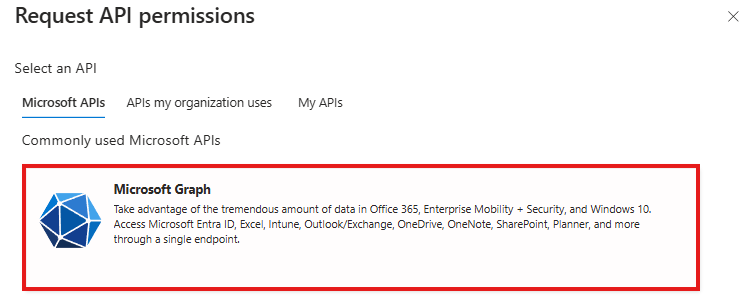
On the next screen, select the **Microsoft Graph** option.
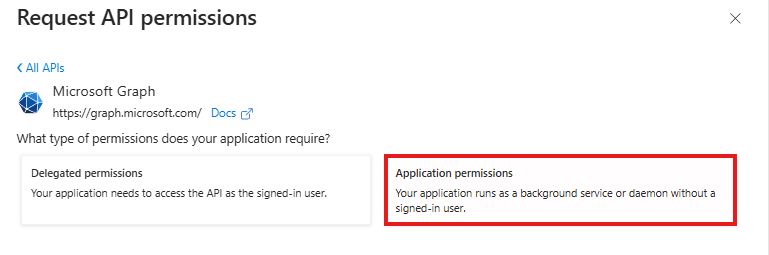
Then, choose **Application permissions**.
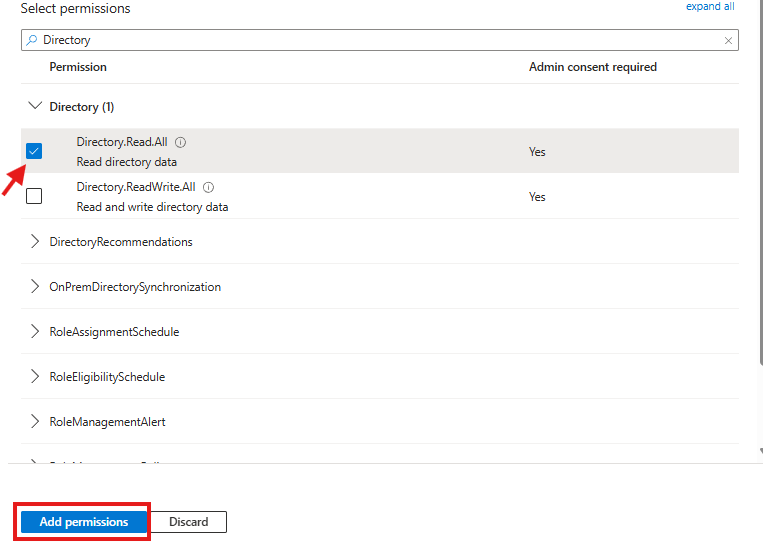
In the following tab, search for **Directory** and select the first option, **Directory.Read.All**, then click **Add permissions**.
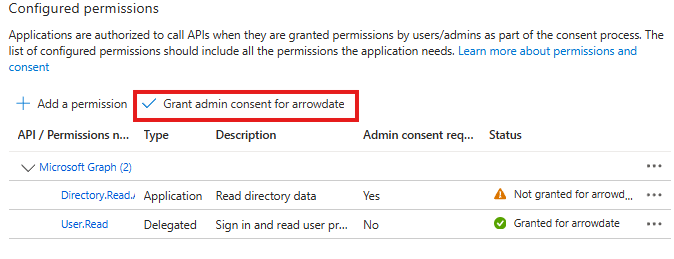
To finalize, grant admin consent by clicking on **Grant admin consent for**.
That's it! Now you will be able to import users and groups from **Azure AD (Entra ID)** into **Power Embedded**.
## Instructions
With the necessary permissions enabled, simply follow the step-by-step process below.
Go to the Power Embedded administration portal, navigate to the migration menu, and follow these steps:
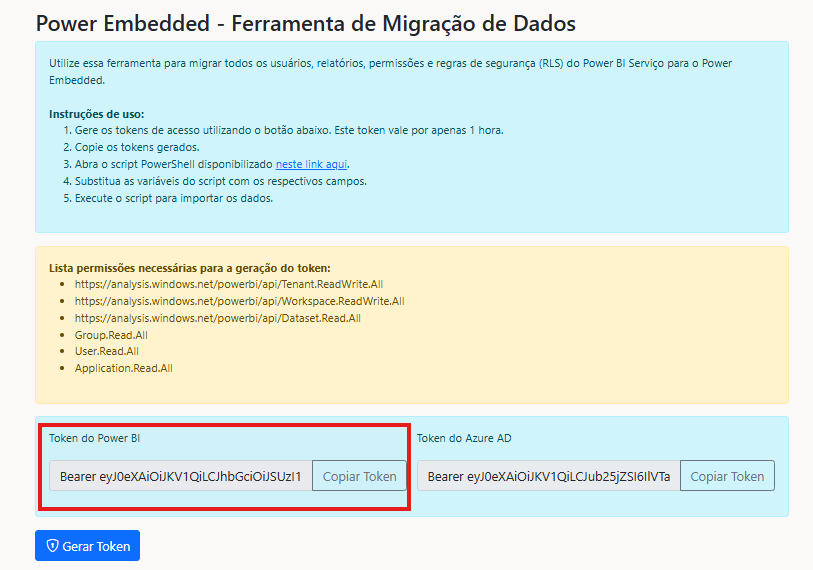
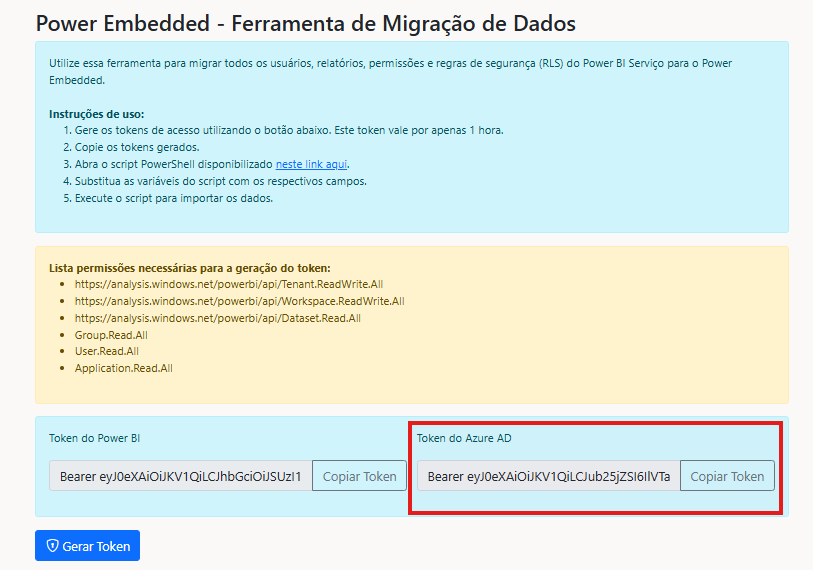
**Step 1:** Generate the access tokens using the button below and copy them. The generated token will be valid for only 1 hour.
**Step 2:** Open the PowerShell script available in the link on this page, copy it, and paste it into the PowerShell console.
**Step 3:** Replace the script variables with their respective values:
**Power BI Client ID:** Access the Power BI Embedded Administration Portal > Settings > “Power BI Client ID” field.
**API Key:** Access the Power BI Embedded Administration Portal > Settings > “API Key” field (click the red icon to generate the key).
**PBI Token:** Key generated in the migration menu.
**AD Token:** Key generated in the migration menu.
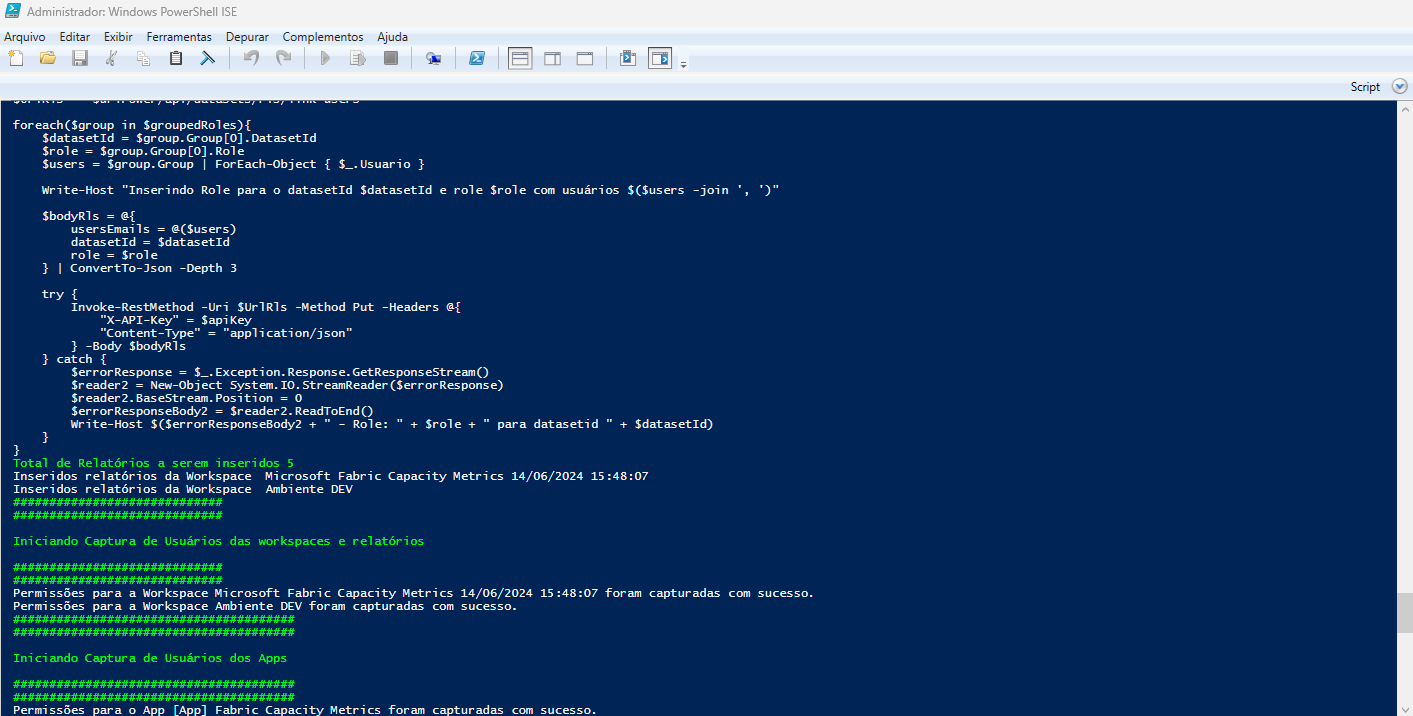
With all the fields filled in, simply run the script in PowerShell.
Once the script is completed, all reports, users, and RLS will be successfully imported into Power Embedded.
 Click the “+ Add people or groups” button.
 PSearch for the name of the previously created application (**PowerEmbedded-App**) and remember to change the access level to **Administrator**. Then, click the **Add** button.
 That's it! Power Embedded now has access to this workspace. Repeat this process for all workspaces from which you want to import reports.
 On the next screen, select the **Microsoft Graph** option.
 Then, choose **Application permissions**.
 In the following tab, search for **Directory** and select the first option, **Directory.Read.All**, then click **Add permissions**.
 To finalize, grant admin consent by clicking on **Grant admin consent for**.
 That's it! Now you will be able to import users and groups from **Azure AD (Entra ID)** into **Power Embedded**.
.png?alt=media)
.png?alt=media)
.png?alt=media)
.png?alt=media)